I’ve been taking a lot of snapshots of regions for Hyperica listings and have been experimenting with the Phototools feature in the Firestorm viewer.
The Phototools feature allows you to pep up your snapshots and make them look gorgeous.
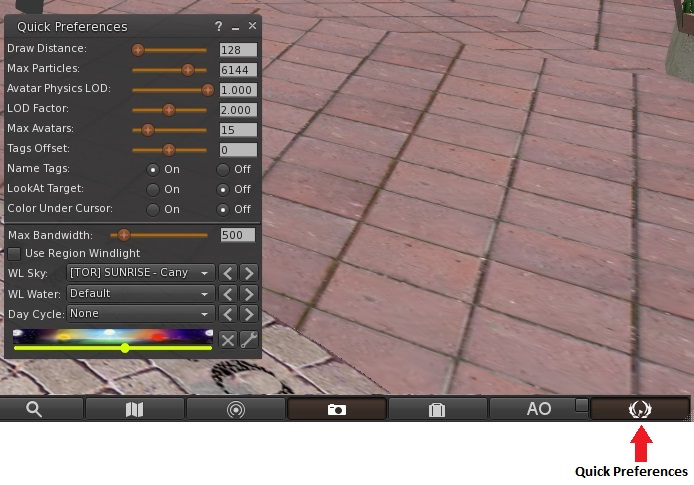
To access some of the Phototools features quickly, at the bottom right corner of the Firestorm viewer, you should see a button that has their logo on it. Click it, and it will bring up the “Quick Preferences” floating window.
If you right-click on the bottom buttons and select “Toolbar buttons…” you will get a large panel of buttons to choose from. You can drag the Phototools one to the bottom button bar if you use it frequently.
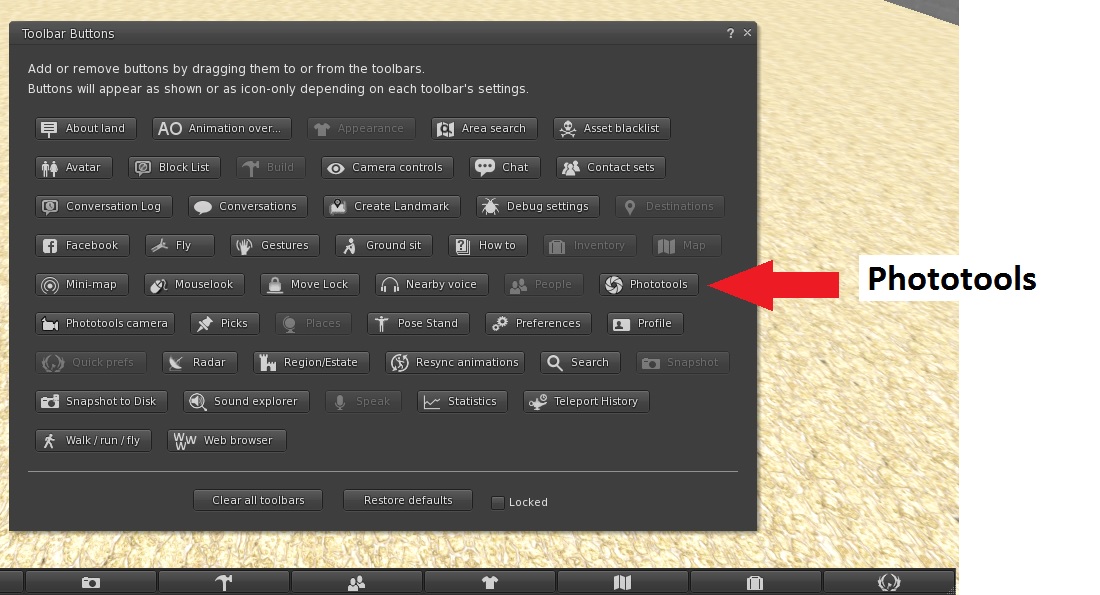
Or you can select it from the top menu, by going to World>Photo and Video>Phototools.
Beginner Settings Tips
Before I found out about this feature in Firestorm, most of my photos either turned out looking the same or they were too dark. A good snapshot should be clear and bring out the key details. The lighting options in Phototools can help that happen.
If it needs to be gloomy and atmospheric, there’s the [TOR] Horror – Dullard setting.
![[TOR] Midday - Baskaholic_001](https://www.hypergridbusiness.com/wp-content/uploads/2015/04/TOR-Midday-Baskaholic_001.jpg)
Right angles
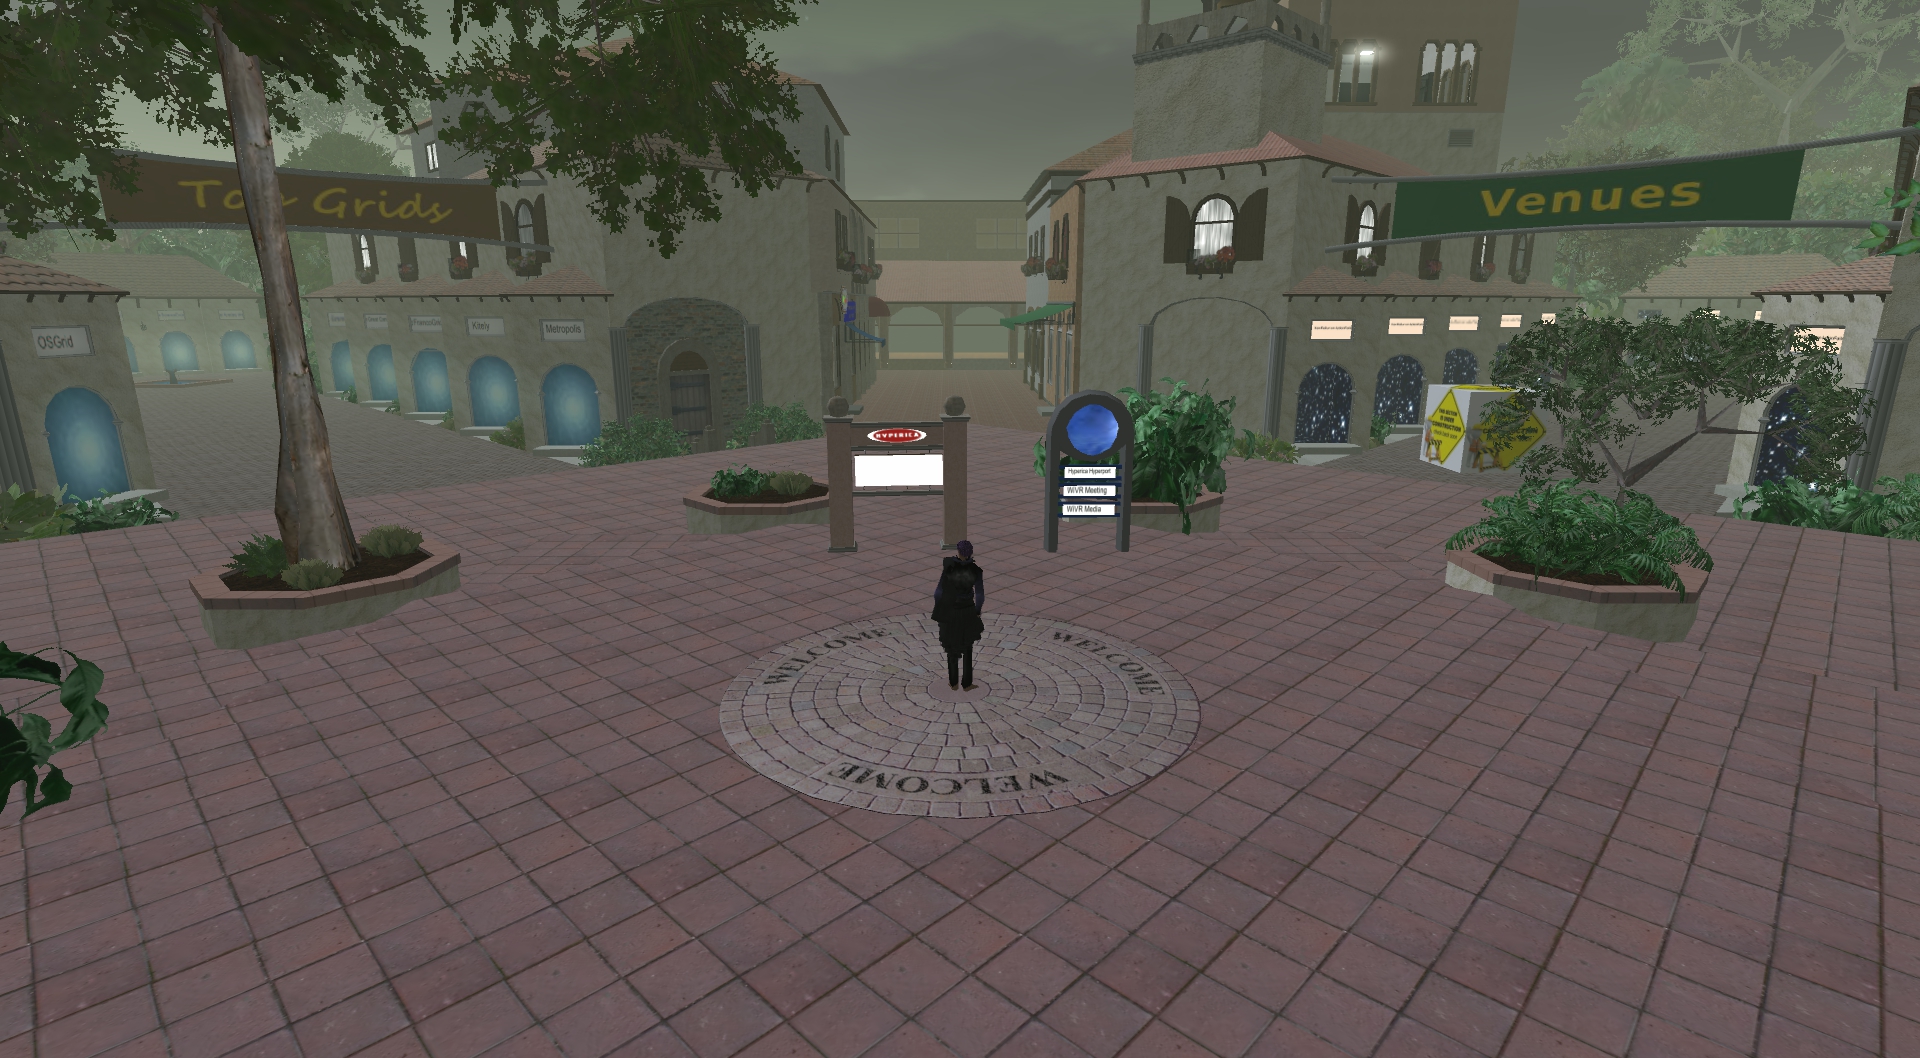
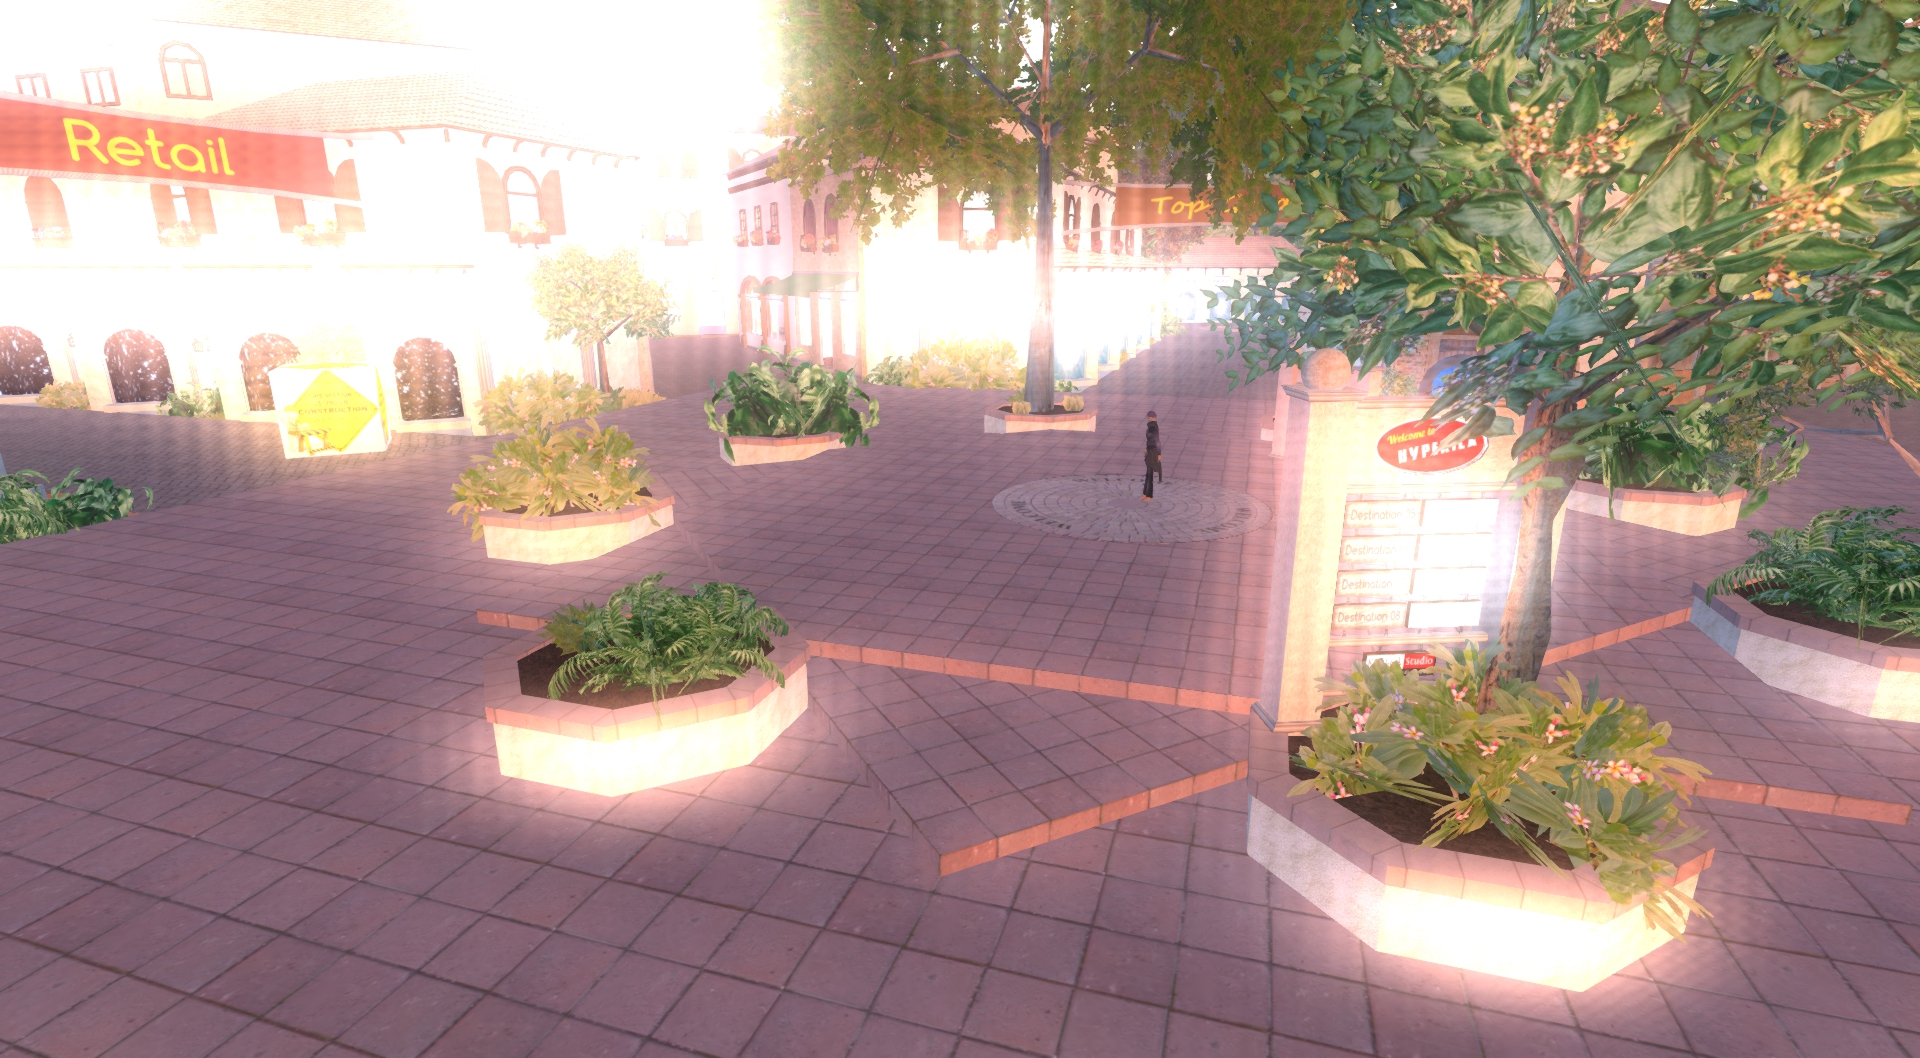
I’ve also found that the viewing angle can also determine the clearness of the photo. If you take a picture of a region and you’re zoomed out all the way, you can’t really tell what it has or what the region features.
Zoom into too close, and you’re looking at a single blade of grass or a brick, which could be anywhere.
There needs to be a medium when taking region snapshots. Close enough to bring out what is unique or awesome about the region, and far enough away to provide some context.
Lighting and viewing angles can also affect one another.
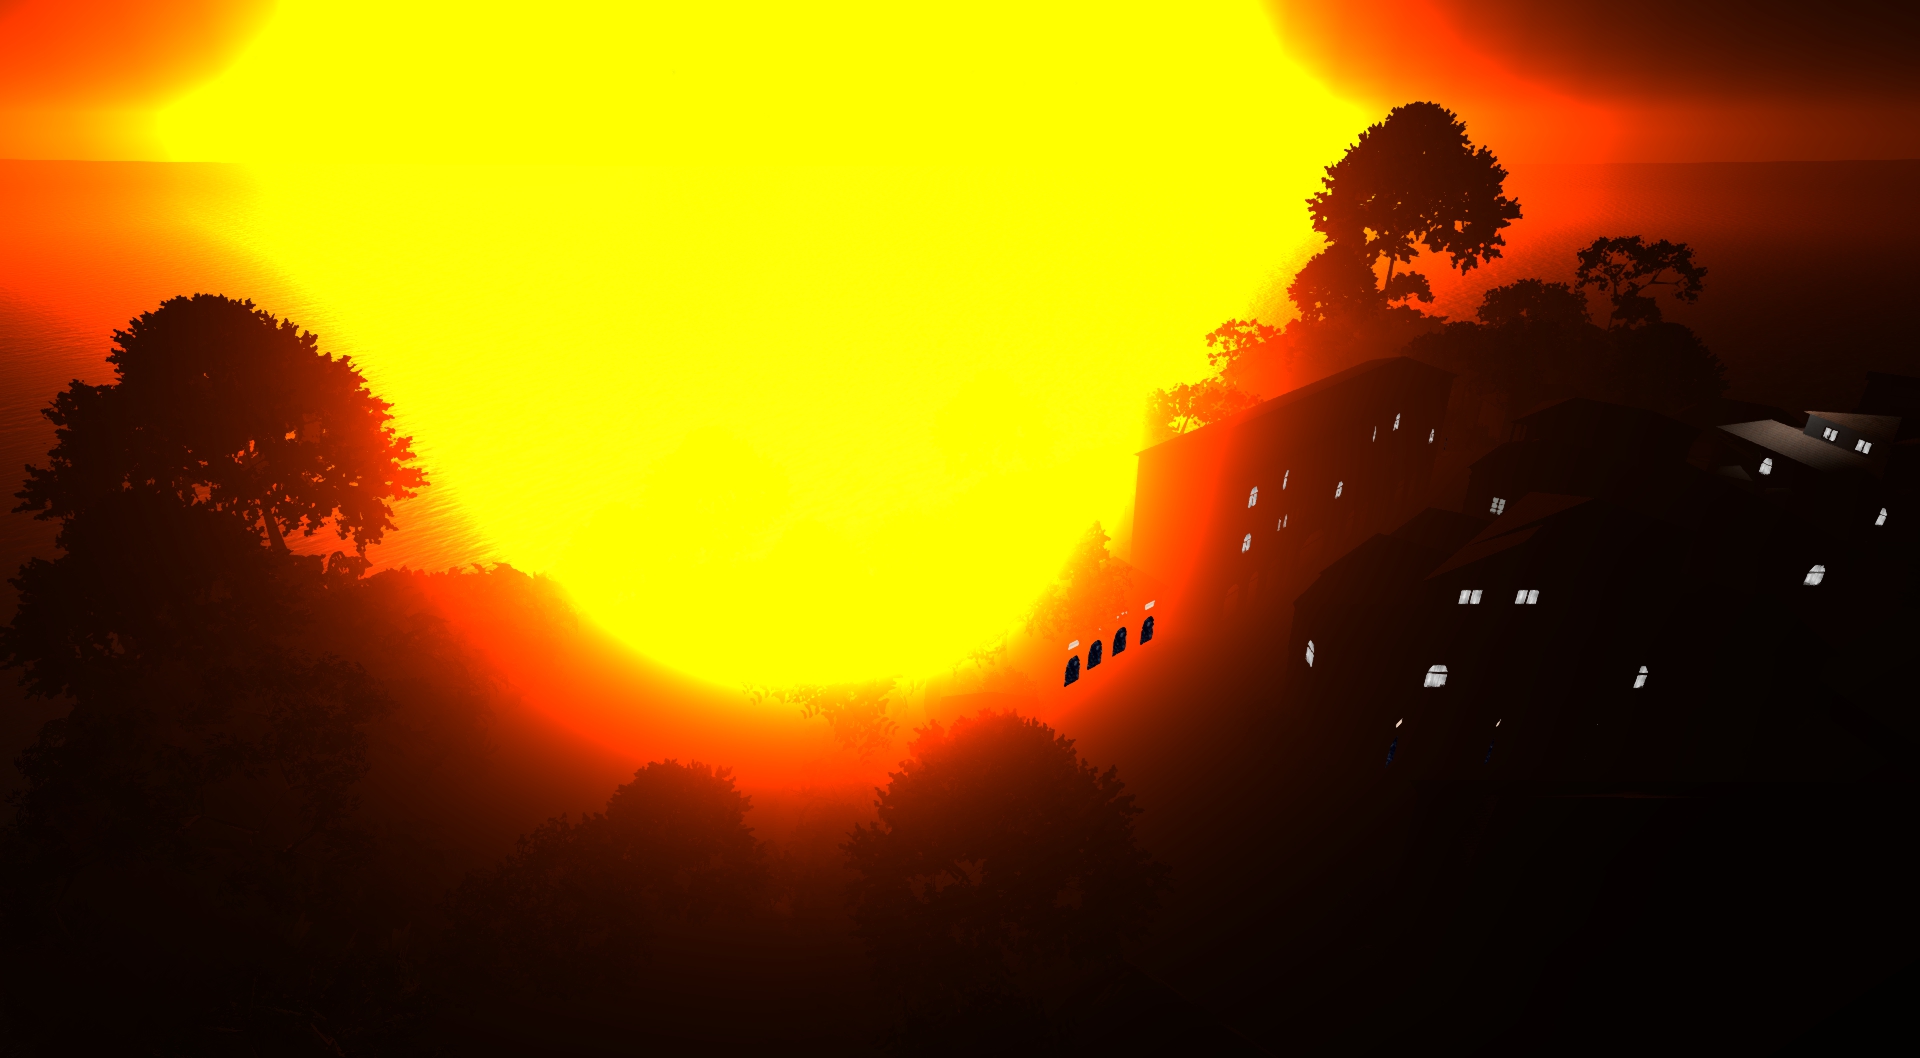
If you are using a bright setting like [TOR] Big Sun, you might want to zoom in a little more because the brightness of that setting would drown out your snapshot.
Water quality
If you have a coastal region or inland waterways, don’t forget about the water effects.
Try to get the water and light to work together.
If you have a water effect that is super reflective with a bright light setting, the region is going to be reflected off the water and be a distraction.
Advanced Settings
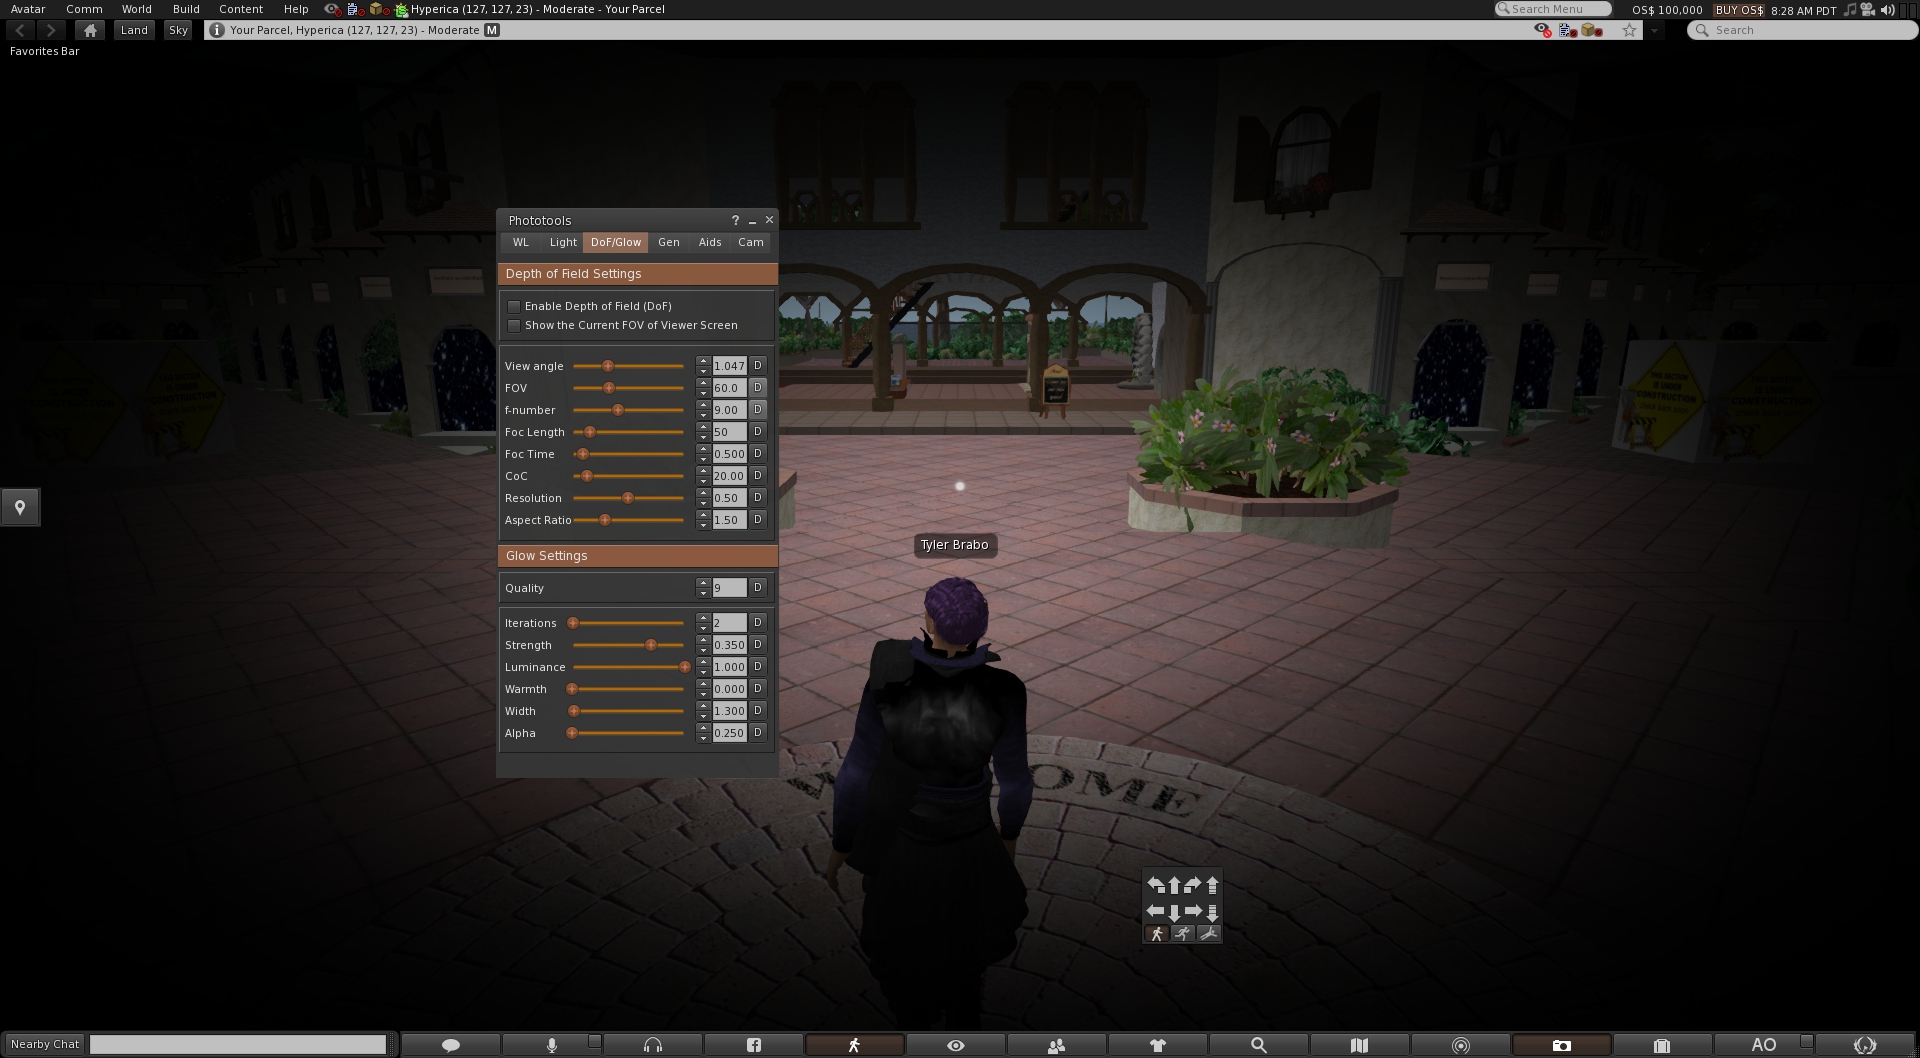
If you want to go deeper into the Phototools feature, go to World>Photo and Video>Phototools. There are six tabs in the Phototools: windlight, light, DoF — depth of field — and glow, general render settings, interface aids, and camera settings.
Windlight has has all of the presets you saw in the Quick Preferences. It also gives you the ability to make your own sky preset. This is helpful if you want to have a preset for each type of region you visit that you can tweak when you want. It lets you change the haze of the sky and choose the haze of the sun and moon.
You can also do the same with the water. If you’re a photographer and want to enhance your skills, this is basically like a virtual photography simulator for you.
The light tab really lets you customize your snapshot skills. It has everything from shade clarity — how defined the shadows are — to blur distance — how blurry things far away look. It also lets you edit the depth perception of the snapshot.
The next tab is the depth of field and flow tab. Depth of field is the sharpness of an object at a distance. It lets you change the FOV — the field of view of the observable world — view angle, aspect ratio, and more.
The glow settings allow you to create warmth and luminance from lights. I’ve found that if you want to create a cool looking slightly blurred photo, just bump up the FOV a bit and add a little warmth, iterations, and strength in the glow section. Tweak it to however you like and you’ve got a nifty looking snapshot.
The general render settings allows you to change the rendering of the environment in your screenshots. A cool feature this has is to adjust the vig — short for vignette — amount, located at the bottom of the tab. It creates this cool tunnel vision effect.
Combine this with a black and white windlight preset, and you’ve got a awesome effect.
Do you have any favorite Phototools settings or presets? Share them in the comments!
- Seasonal events on the hypergrid - December 23, 2015
- Devil’s dozen Halloween events - October 29, 2015
- Kitely Merchants Fair starts Sunday - October 17, 2015