I’ve written about New World Studio before, and just reviewed their Community and Licensed editions.
The following are instructions for how to run the Community Edition the first time, and how to configure it without paying for the Licensed Edition. (Though the Licensed Edition makes the configuration a lot easier, and adds in a bunch of other functionality. I upgraded, because I like supporting OpenSim development, and because I’m lazy and don’t like configuring things myself. Though I totally can.)
So. First, here’s how to have your own virtual world in five clicks of the mouse.
Go to the New World Studio downloads page and click on the Community Edition version you need — it’s available for Windows, for the Mac, and for Linux. Go have coffee — the download will take a while, since it includes every single component you need to run OpenSim. Unzip the file, open the unzipped folder, and click on NewWorldStudio.exe. Click on the first button, labelled Start 3D world.
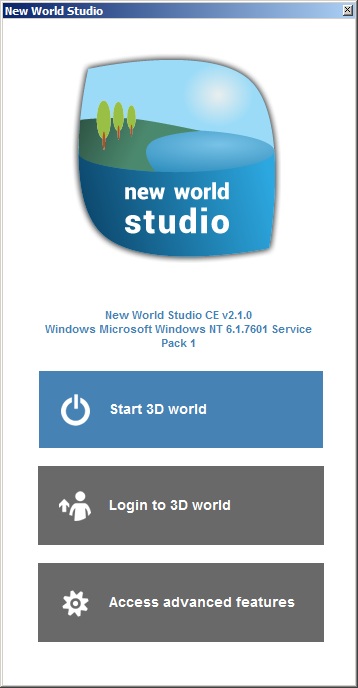
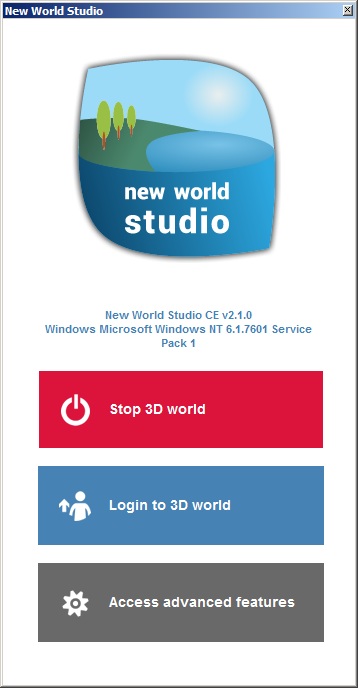
Now sit back and wait as New World Studio does all the hard stuff. It configures your Apache server, your MySQL database, your OpenSim server, loads a starter region, and creates an avatar for you. In a couple of minutes, the first button will flash red, and become Stop 3D world, and the second button — Login to 3D world — will turn blue. Click that second button to enter your world.
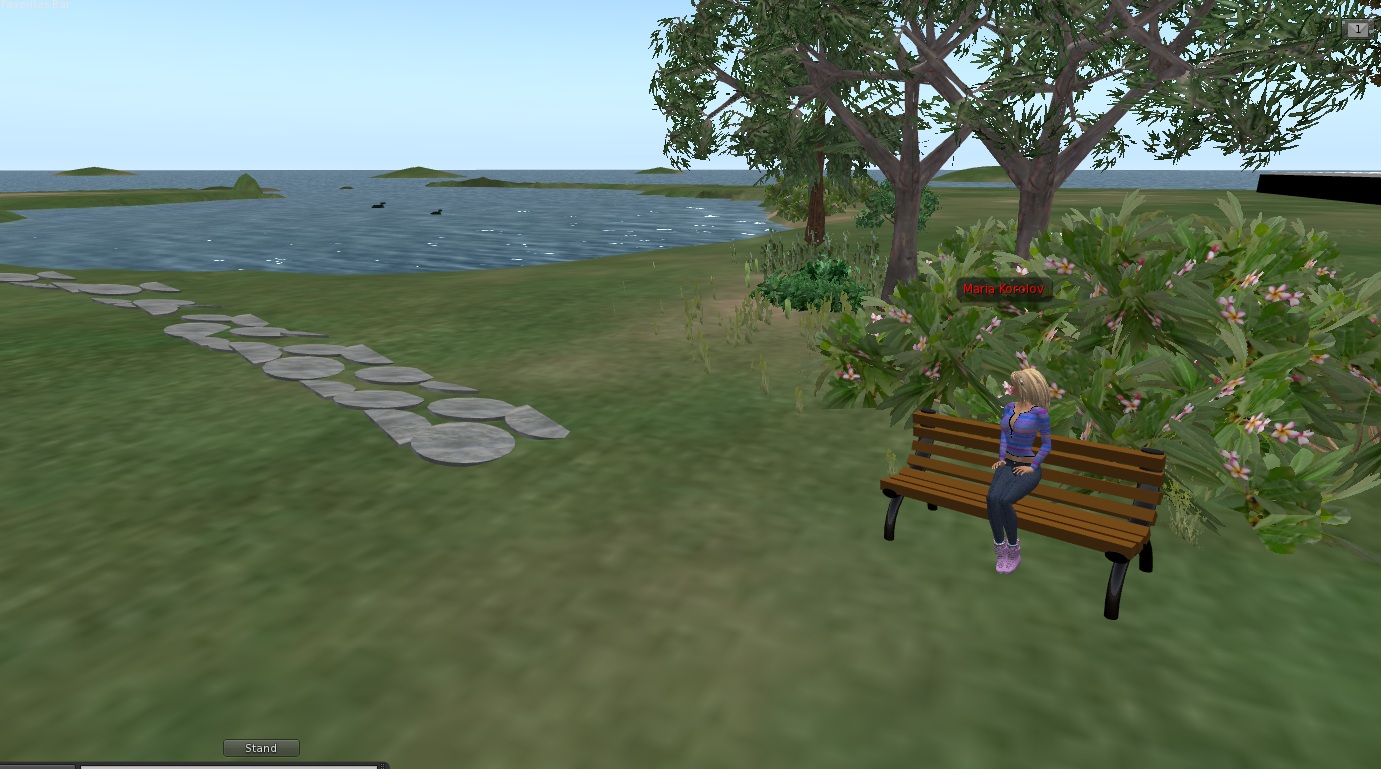
New World Studio now loads up a viewer, and logs you into your very own, private virtual world. If you know how to use Second Life, think of it this way — you are now the owner of a region, and are saving yourself $300 a month plus a $1,000 setup fee. You can now do anything you want here. You can build, your can change the terrain, you can change your avatar.

If you don’t mind having just one region to work on and having “NewWorld Studio” as your avatar name you’re done. You can stop reading. Go have fun building!
Configuring your world
But say you want a different starting region, different avatar, or more than one region? What do you do? And can you do it without becoming a network engineer?
One option, as I mentioned before, is to upgrade to the licensed version of New World Studio, which, in addition to offering all the configuration option listed below in a very nice, easy interface also adds backups, upgrades, firewall configuration, and other nice features. Another option is to dive into the OpenSim configuration files. I’ve done that before. I’m not doing it again.
But there’s an easy way to do a lot of customization pretty quickly, just by editing one file in Notepad.
But you have to do it before you start up New World Studio for the first time. Oh no, you say — I’ve already started it! That’s okay, just go back to the beginning. Delete the whole New World Studio program folder that you unzipped — or rename it or move it somewhere else — and unzip your original zipped download again.
If you’ve deleted it, pull it out of your trash.
But this time, after you unzip, don’t jump right in and run the installer. Hold on and take a look at the NewWorldStudio.ini file.
You can open it with any text editor, such as Notepad. It’s a small file, and pretty understandable, but I’ll walk you through it.
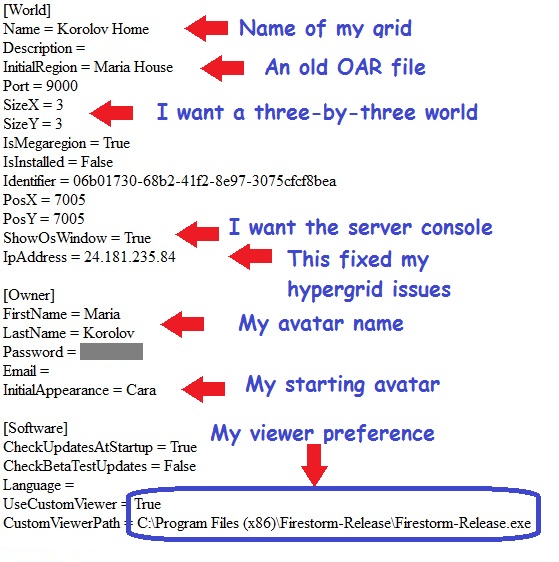
First, look at the [World] section. This is where you can change some things about your OpenSim installation.
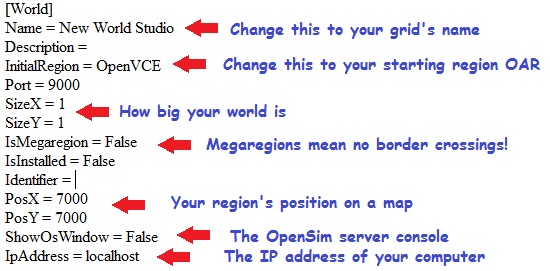
First, you can change the name of the world. Where it says Name = New World Studio just replace New World Studio with something else, anything else. Such as Name = Monkey Planet.
Then look at the InitialRegion = OpenVCE line. OpenVCE is the conference center that you start it by default. You can change it, but not to anything. You have to pick from a list.
To see the available options, go back to your New World Studio unzipped folder and open the regions folder.
As of this writing, the other options are Flat 21, Business District (LindaKellie.com), Mountain Retreat (LindaKellie.com), and Undersea Observatory (blog.wsd.netjreeve). Copy those names, and put them into the NewWorldStudio.ini file like this: InitialRegion = Flat 21 or InitialRegion = Mountain Retreat (LindaKellie.com) making sure you get the names exactly right. Copy-and-paste, to be totally sure.
If you want to use a region that doesn’t come provided, such as an older region you’ve saved before, or one you downloaded from Kitely, or one your friend gave you, or one you got from LindaKellie.com or OpenSim Creations, create a new folder for that region and name the folder with the region’s name. Put your region’s OAR file into this folder, and rename it to just region.oar. Put the name of the folder into the NewWorldStudio.ini file. That’s what I did. I copied over an OAR file I saved two years ago.
Moving on. We’ll skip the port number — that’s for when you have multiple copies of New World Studio running on the same computer. I don’t want to get into a discussion of port forwarding here.
The next option is SizeX and SizeY. These refer to the size of your world. Do you want to keep it at one region? Leave both values at 1. Do you want a four-region world? Set both values to 2. Now you’ll have a 2×2 world, with the four regions arranged in a square. You can also put them all in a line — just set SizeX = 4 and SizeY = 1.
How big can you go? It depends on the power of your computer, and how much stuff you plan to have on each region. Intel was able to run more than 1,000 regions on a single computer. Of course, that was Intel. On an average home computer, you should easily be able to do four regions, or push it as high as 16. Â If you need more, just create duplicate copies of New World Studio. I have mine set for nine regions, in a three by three configuration.
The next line is IsMegaregion = False. If you’re going to have more than one region running, you might want to set it to True so that you don’t have to deal with border crossings. Keep it False if you plan to save your regions as individual OAR files in the future. I have mine set to True because I plan to save the whole nine-region thing as a Multi-Region OAR, which I can then upload to Kitely (the guys who originally donated the multi-region OAR code) or share on OpenSim Creations.
PosX and PosY refer to your region’s position on a giant map. You can ignore this if you have a private world, but if you’re going to be hypergrid teleporting to other grids, keep in mind that you can’t jump more than 4,096 regions in any direction, and you can’t jump between regions with the same coordinates. So if you want to be able to travel to the OpenSim Creations grid, you’ll need to be within jumping distance of 1000,1000, which is where they’re centered. I recommend coordinates like 4076, 4019 — unusual numbers, so that other folks aren’t likely to put their grids on the same spot. But OSgrid is centered on 10000,10000. So if you want to jump mostly to that grid, the 7000-neighborhood is a good place to be.
Next is the line that says ShowOsWindow = False. Change it to ShowOsWindow = True if you want to see the server console window while OpenSim is running. The server console is where you would type in advanced commands, such as saving regions as OAR files, exporting inventories as IAR files, moving and renaming regions, and other advanced functions.
The last item in this section I want to point out is the line that says IpAddress = localhost.  In order for me to be able to travel to other grids, I had to look up my computer’s IP address and replace localhost with the actual number. So, in my case, it became IpAddress = 24.181.235.84 — if you can’t get your hypergrid jumps to work, one thing you can do is try changing this setting.
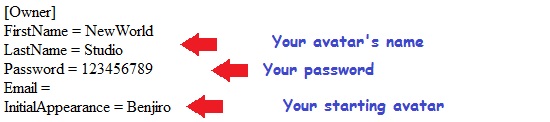
Moving on to the [Owner] section, this is where you change your avatar name and initial appearance. New World Studio comes with four starter avatars — just pick the one you want. Note that you need to spell the names correctly, and if using Benjiro 2 or Cara 2, remember the space before the 2.
Finally, one more thing you might want to change is your choice of default viewer. The standard installation launches Imprudence. But what if you wanted to use a different viewer — like, say, Firestorm?
The answer is in the [Software] section of the file.
First, change UseCustomViewer = False to UseCustomViewer = True.
Then look up the address of your viewer. In my case, on Windows, I right-clicked on the viewer icon on my desktop and selected Properties. The address was in the Target: box: “C:\Program Files (x86)\Firestorm-Release\Firestorm-Release.exe” –channel “Firestorm-Release”  –settings settings_firestorm-release_v4.xml –set InstallLanguage en
You don’t need all of that. Just the first part that’s in the quotation marks — in my case, C:\Program Files (x86)\Firestorm-Release\Firestorm-Release.exe — your address might be different, if you installed the viewer to a different folder, or you want to use a different viewer.
Copy that, and change CustomViewerPath = nothing to CustomViewerPath = C:\Program Files (x86)\Firestorm-Release\Firestorm-Release.exe — you don’t need quotation marks. Now when you click on Enter world, New World Studio will automatically log you in with your preferred viewer.
The rest of the settings have to do with the MySQL database and other stuff you shouldn’t fiddle with unless you know what you’re doing.
After you’ve made all the changes, start NewWorldStudio.exe.
It took me a few tries to get it configured right, with just the right number of regions, the right avatar name, the right IP address, the right viewer, the right starting avatar, and the right starting region.
But it was totally worth it. The first thing I did was jump over to my company grid, at hg.hyperica.com:8022. Then I jumped to hg.osgrid.org:80:samsara then to the Freebie Mall region on OSgrid, where I picked up a new red cardigan and brought it home to my little personal grid. Remember to set your home position before your first jump, or you won’t be able to come back. My first project will be to put up a permanent hypergate up to my office on Hyperica, and to my favorite shopping and meeting places.
If you’re like me, getting this working through trial and error, I recommend making copies of things along the way — copies of the NewWorldStudio.ini file, for example, once you’ve got the settings right. Or if you use your own OAR files for starting regions, making copies of those region folders.

- Classic metaverse books on sale now at Amazon - May 16, 2024
- All OpenSim stats drop on grid outages - May 15, 2024
- 3rd Rock Grid residents find new homes on ZetaWorlds - May 14, 2024