In order to write about how to create stuff for sale on the Kitely Market, I’ve been playing around with baked-on clothing textures. In the process, I’ve learned a few more things about using layers to create textures with GIMP.
Say, for example, you want to create a piece of clothing and make it available in multiple colors.
Like this jacket:

If you look closely at the jacket, there is a fabric texture there, plus wooden buttons.
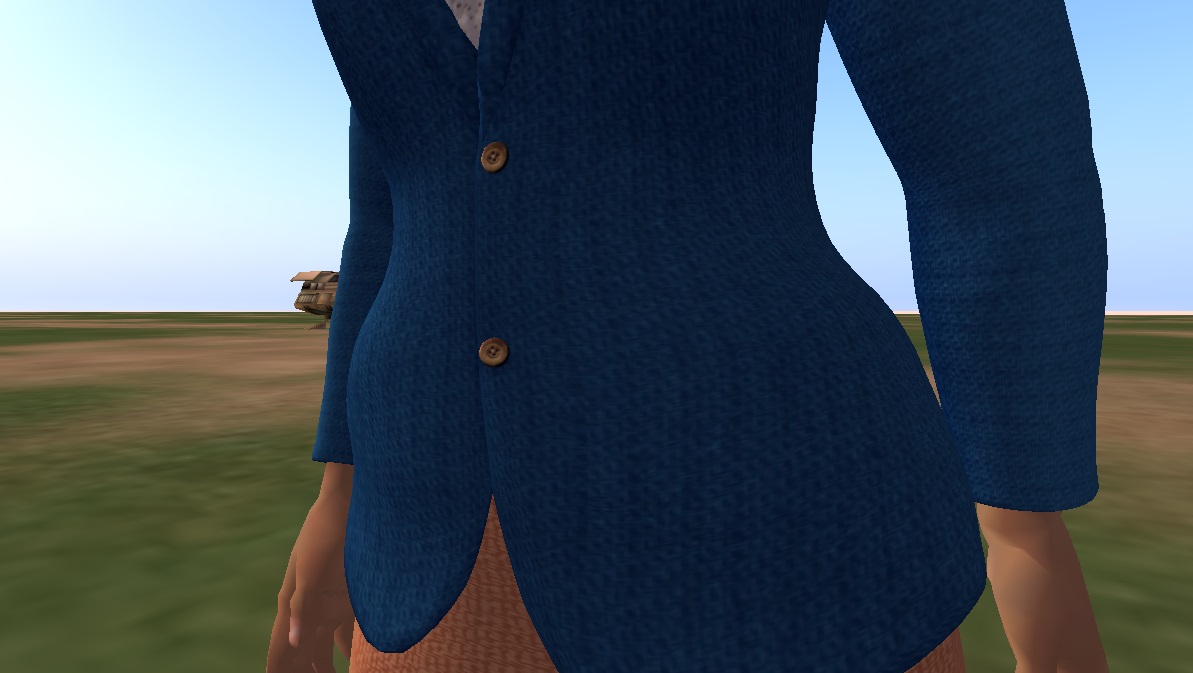
Simply applying a color to a texture in-world isn’t going to work — it will wash out the texture, and also color the buttons.
So what I finally wound up doing was putting the buttons on one layer, the fabric texture on a second layer, and the jacket color on a third layer. I could then easily change the color of the bottom layer without affecting either the fabric texture or the button colors, and save the results as new JPG images to upload into Kitely and apply to different versions of the jacket.
I used to have a really hard time with the concept of layers, but with practice, it got easier. In particular, working through very simple tutorials helped me develop a feel for how they worked.
So here’s a tutorial for anyone who wants to improve their clothing textures by a tiny bit.
Step 1. Get your materials together
For this particular tutorial, you’ll need the latest version of GIMP, and the clothing template you’d like to texture.
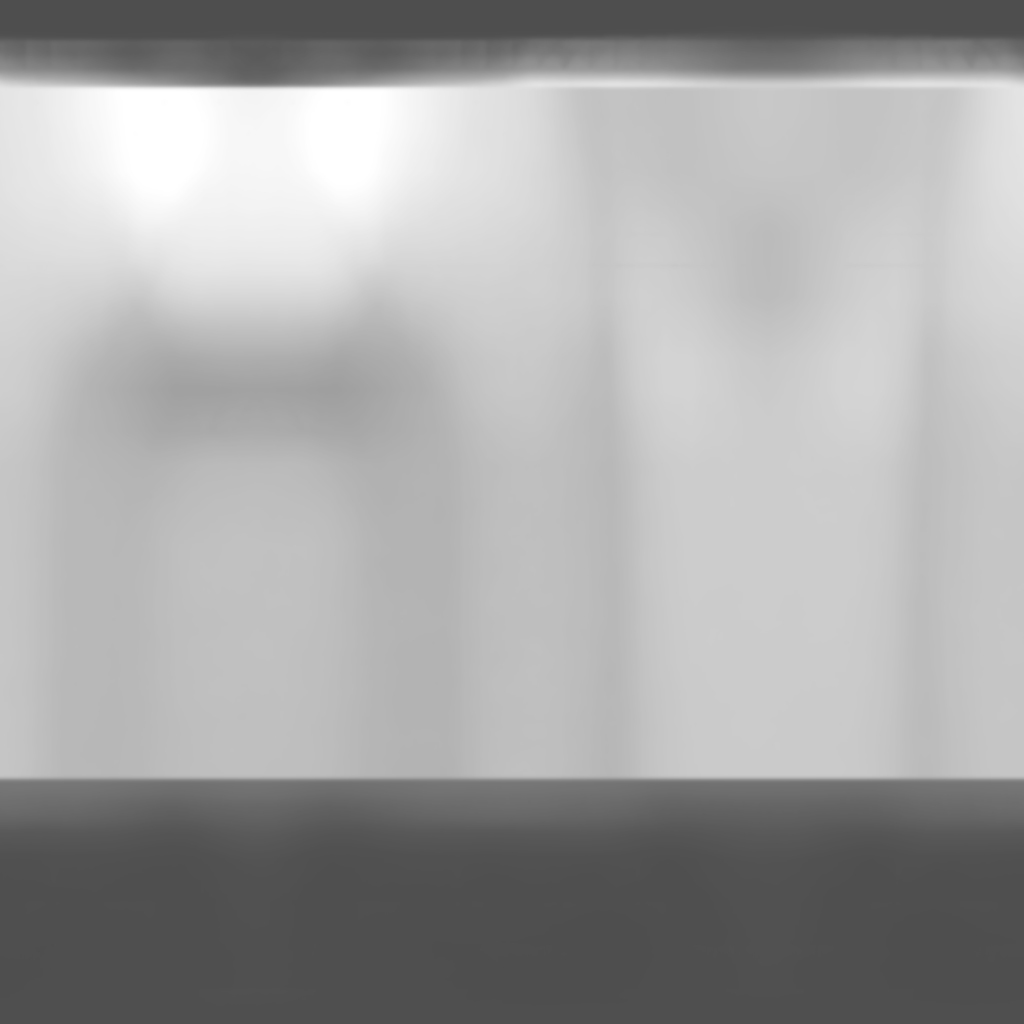
In my case, that’s Damien Fate’s mesh skirt bake texture.
And this flower pattern that I made from scratch. It’s a little hard to see, because it’s white flowers on a transparent background. But feel free to download it — it’s licensed CCO for any use you want.

I open them up in GIMP.
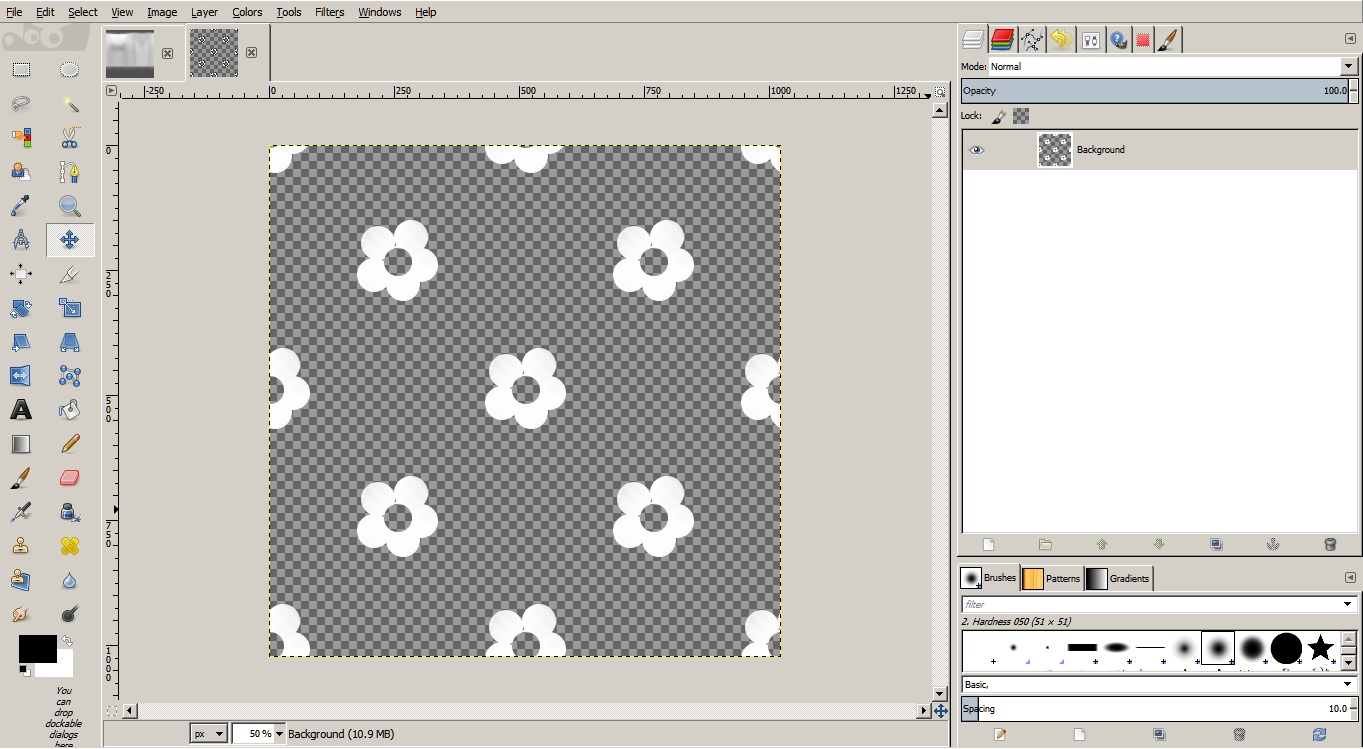
If your screen doesn’t look like mine, you might want to go to the top menu and select Windows>Single-Window Mode. I’ve also expanded the left-hand tool bar by clicking on its edge and dragging it until it was twice as wide.
Step 2. Stack the layers
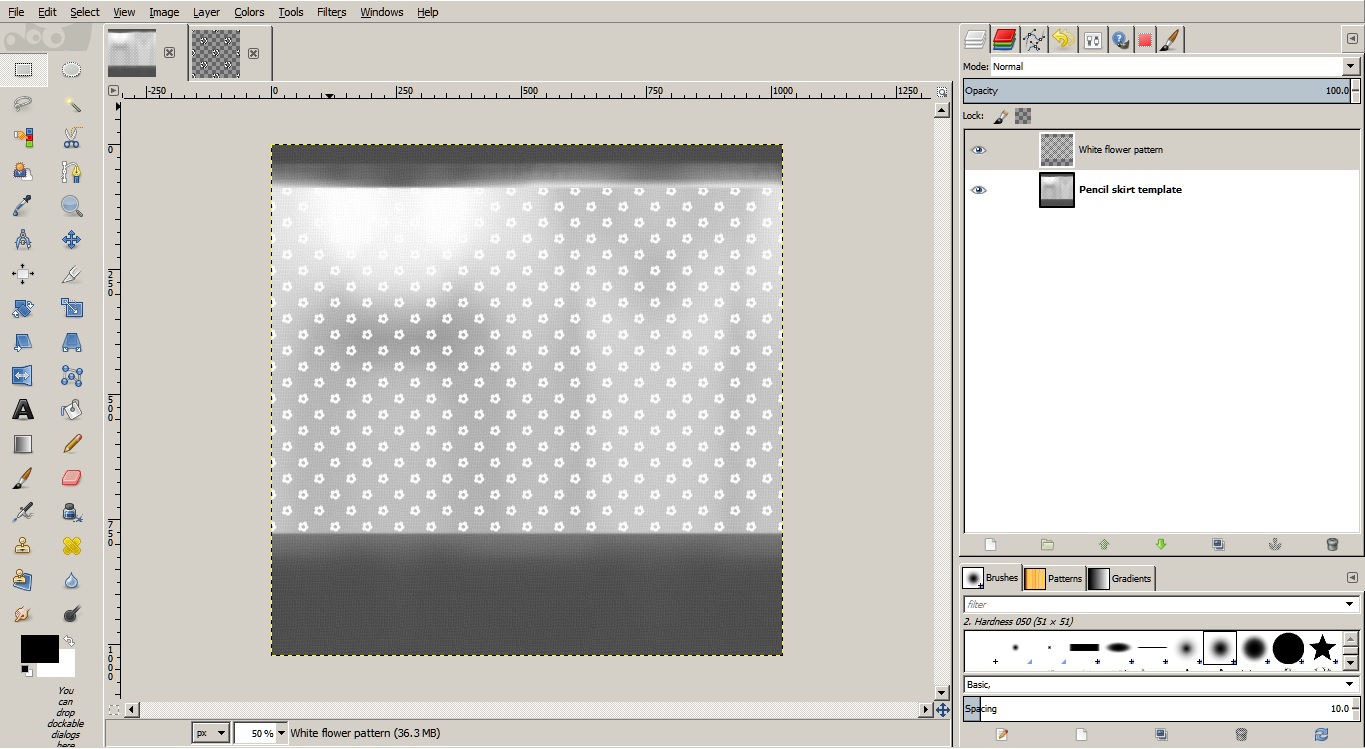
If you look at the image above, you can see that I have the skirt template in one tab, and the flower pattern in a second tab.
To stack them up, I click on the flower pattern tab, select all by clicking Ctrl-A, copy the layer by clicking Ctrl-C, then select the skirt tab, and, from the top menu, choose Edit>Paste As>New Layer.
Now the flowers are on top of the skirt texture.
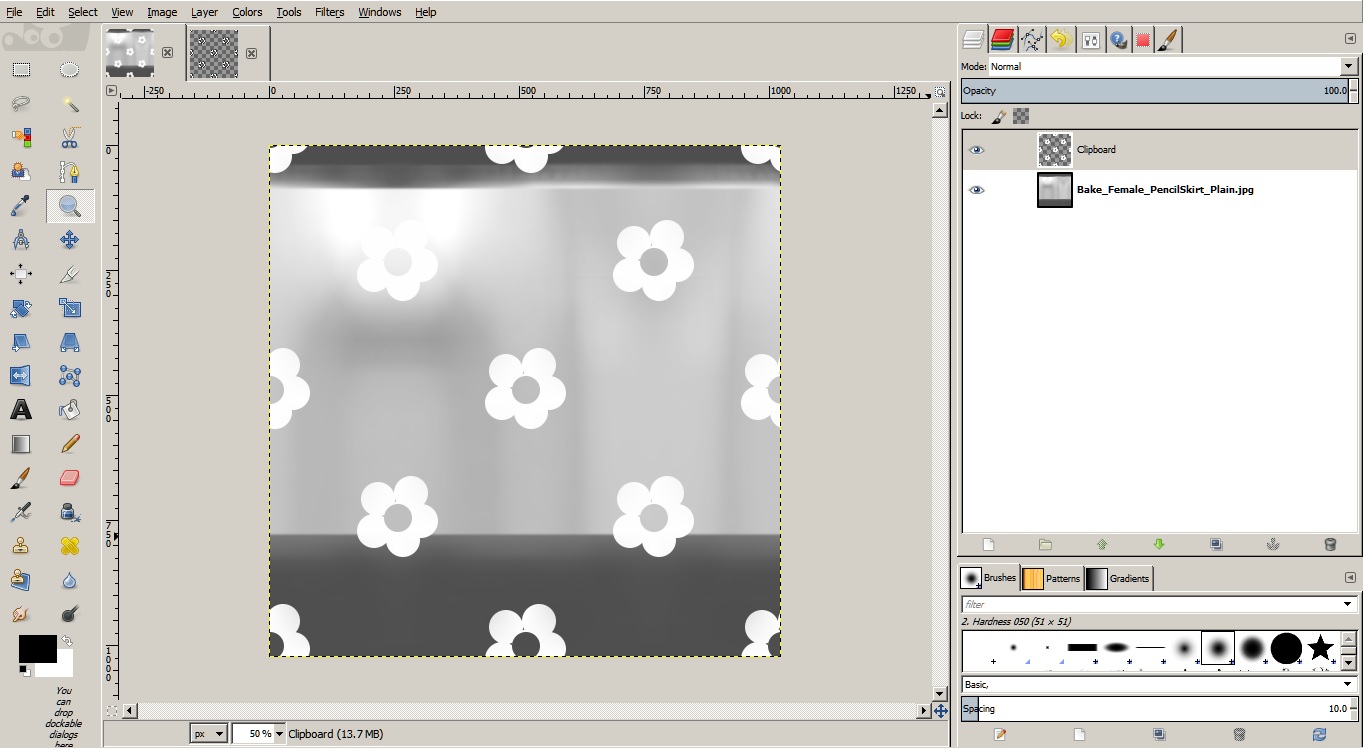
But they’re still separate layers. Kind of like layers of tracing paper on top of each other, or those transparency sheets they used in use in overhead projectors when I was in high school.
Step 3. Edit the flower layer
You can see right away that it’s not going to work. The flowers are much too big for the skirt. I’m going to apply a filter to make the flowers smaller.
First, I select the layer I want to work on. You can see the layers in the right-side panel — the flower pattern layer is on top, and the skirt template layer is underneath.
You can right-click on the layer in this panel, select Edit Layer Attributes, and change the name of the layer. This is useful if you have lots and lots of layers and have problems telling them apart.
What I am going to do is select the top, white flower pattern layer, and make it into a smaller pattern by choosing Filters>Map>Small Tiles from the top menu. They’re still too big, so I go to Filters>Repeat “Small Tiles” a couple of times, until the pattern is as small as I want it.

Then, to create a fabric effect, I’ll select the skirt template layer, go to Filters>Artistic>Apply Canvas and select a depth of “1.” Then to have the same fabric effect on the flowers, I’ll select that layer, and go to Filters>Repeat “Apply Canvas.”
Now I’ll crop the white flowers so that they don’t go over the dark parts of the texture, by selecting the flower pattern layer, going to the little rectangle select tool at the very top left of the screen, stretching the rectangle selection across the top dark gray area and cutting the flowers with Ctrl-X. Then I cut out the bottom section of flowers.
Okay, now I’m all set to apply colors.
Step 4. Add a color layer
To create a new layer go to Layer>New Layer and pick a color. In my case, I picked “White.” That creates a layer on top of all the existing layers.
Go to the later selection area on right, click on the new white layer, and drag it to the bottom, below the flower pattern layer and the skirt template layer.
White I’m at it, I’m going to rename it “Color Layer” by right clicking on it and selecting “Edit Attributes.”
Then, while I have that color layer selected, I’m going to go to the color chooser at the bottom left and pick myself a color, click on the paintbucket tool in the middle of the left-hand tool bar, and then click anywhere on the image to fill the color layer with a color.
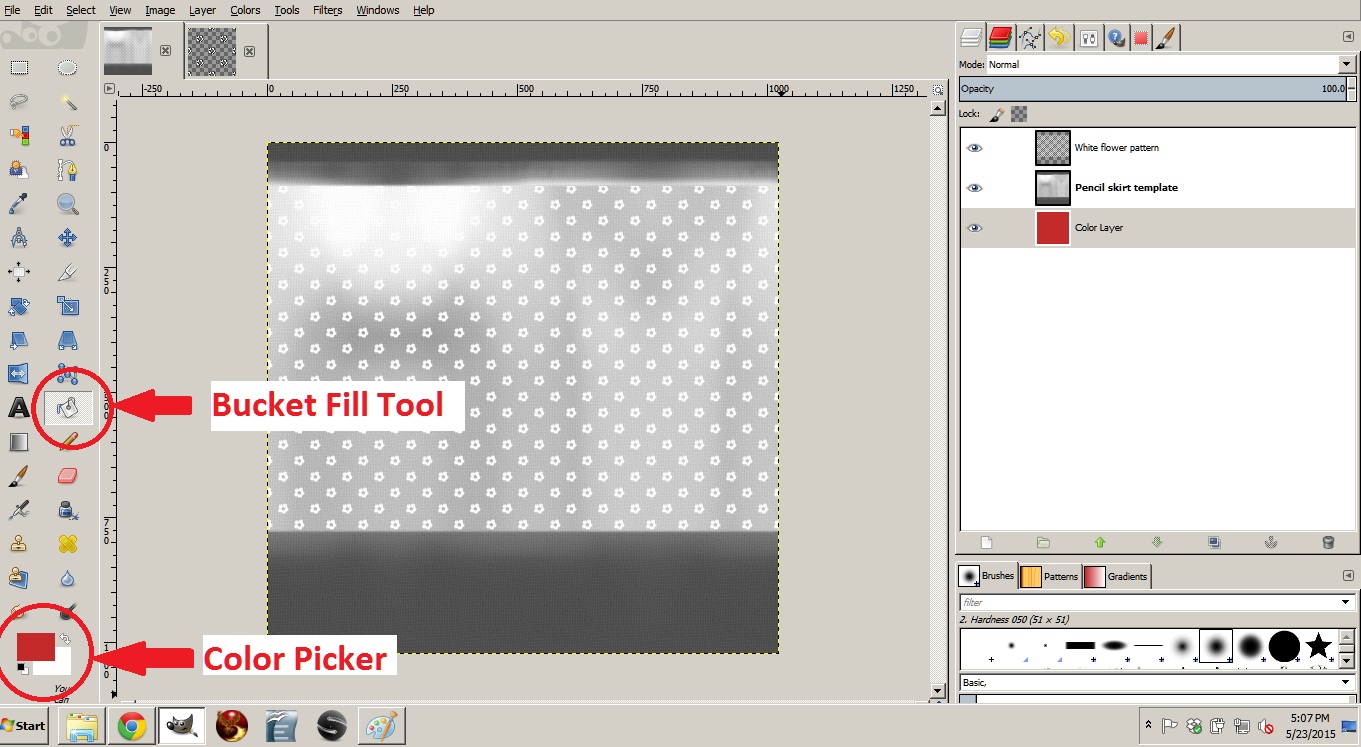
You can see that the little color layer icon in my layer list has turned red — but there was no effect on the main image.
That’s because the layer in the middle — the skirt template layer — is solid. There are no transparent parts in it to show through.
Now I’m going to select that middle layer and make it an “overlay” layer.
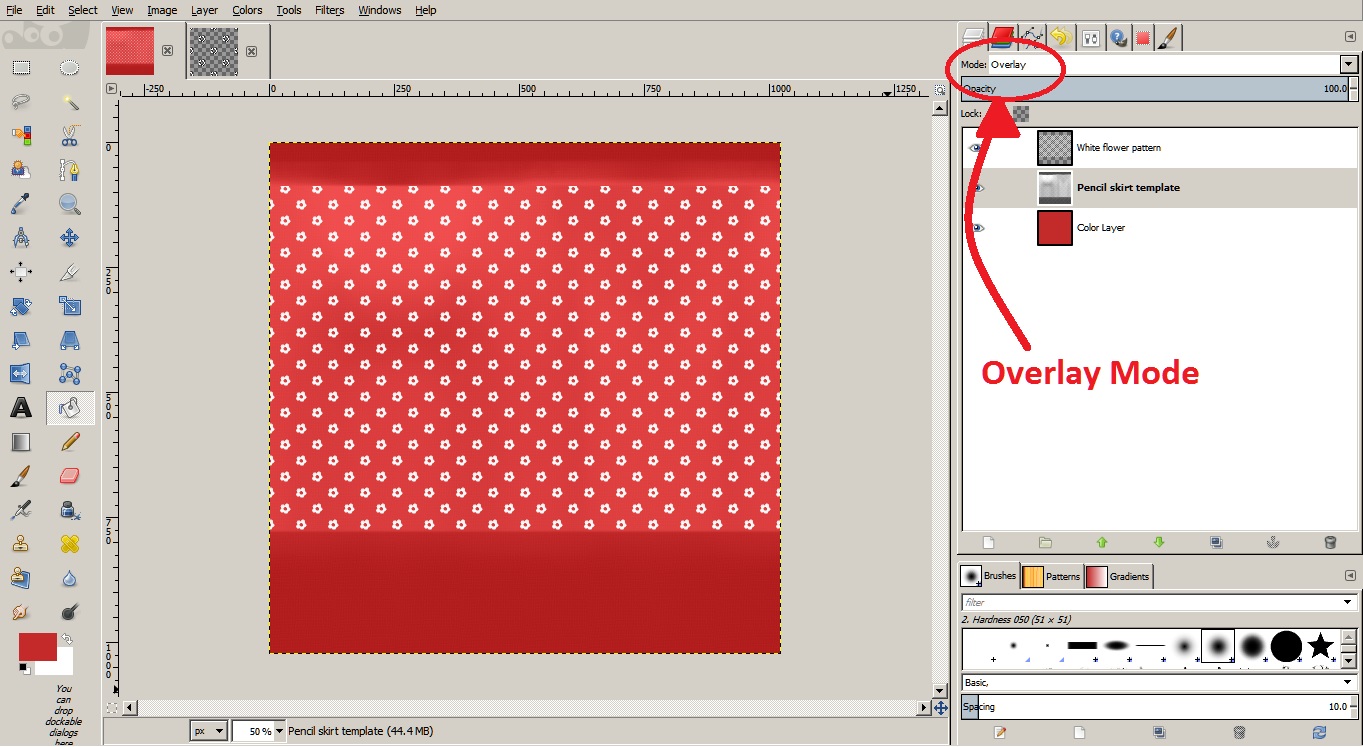
You can see the results above.
Now I’m going to save the results twice — first, as a GIMP file, so I don’t lose all the layers. And, second, as a JPG file so use as a bake texture in-world.
To save as a GIMP file just go to File>Save As and pick a file name and a location to save it.
To save as a JPG file, go to File>Export As and type a name like “Red skirt bake.jpg” and click the “Export” button.
Then to change the color, make sure you’ve got the bottom color layer selected. Pick a new color using the color picker. Make sure you still have the bucket fill tool selected, then click anywhere to fill the bottom layer with the new color.
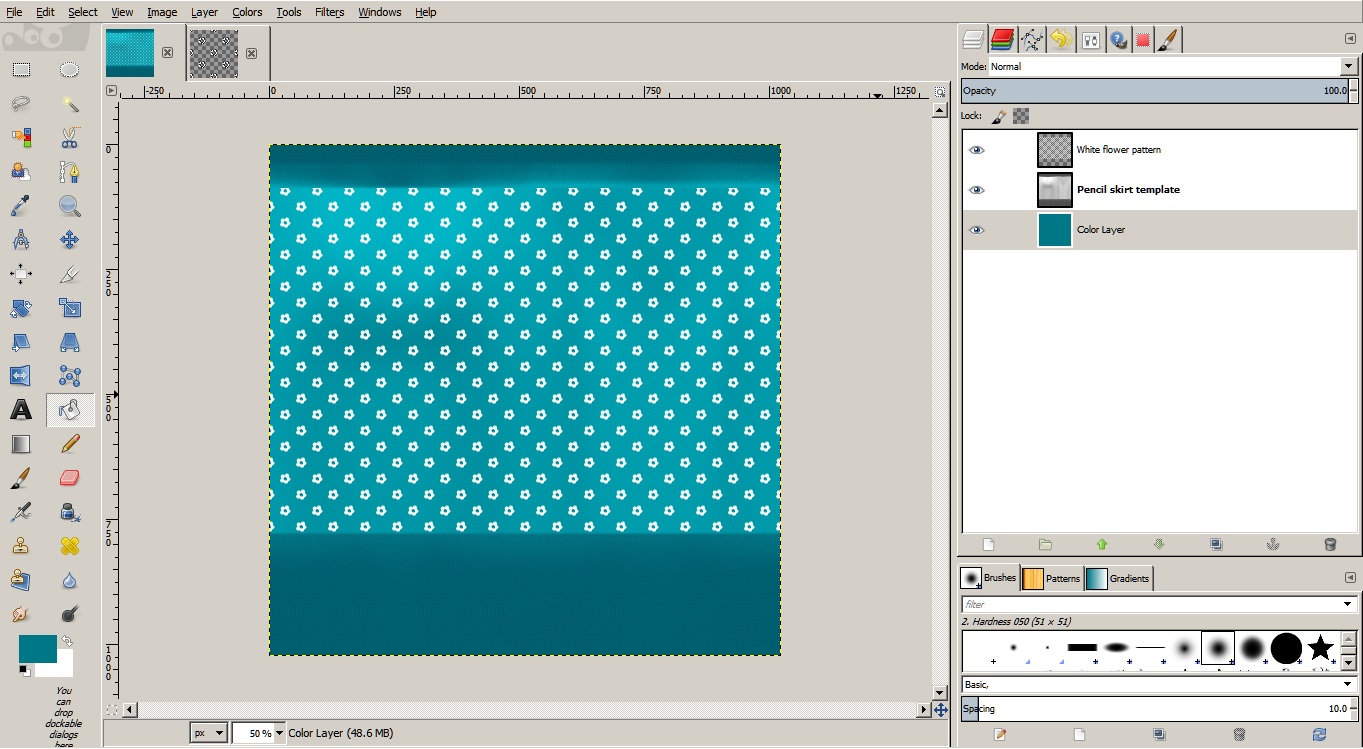
Note that the white flowers stay white — that’s because the top, flower pattern layer, is in Normal mode, fully covering up what’s on the layers below.

The exported red bake texture. You should be able to see the white flowers more clearly now.
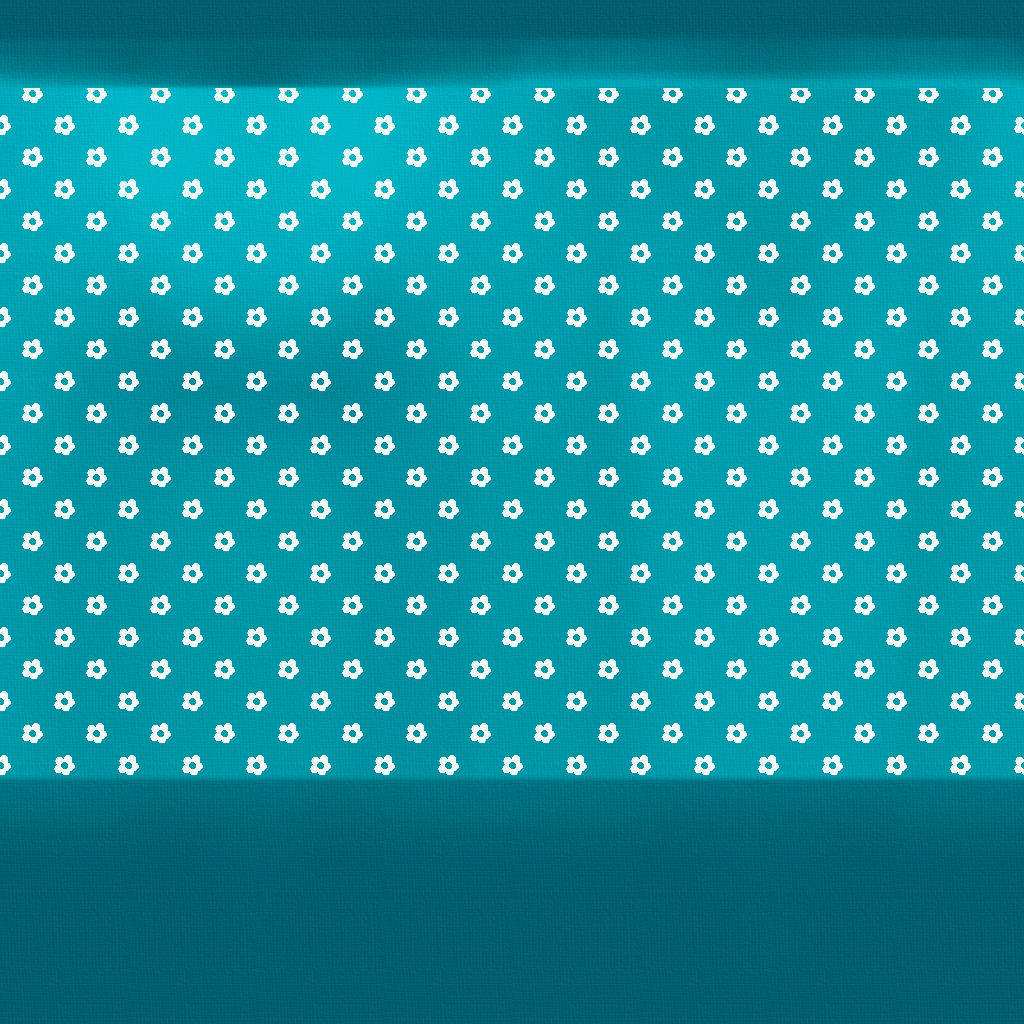
The exported teal bake texture.
Notice how quick it is to change the colors — pick new color, click to fill, export. Pick new color, click, export.
Step 5. Apply it to the in-world object
You can get all the Damien Fate templates here. Unzip and find the pencil skirt DAE file.
Then, if you have the Firestorm Viewer:
- Build>Upload>Mesh Model
- This model represents> Choose “Avatar attachment”
- Upload options>For avatar models only>Check “Include skin weight”, “Include joint positions”
- Click on “Calculate weights & fee”
- Click on “Upload”
The uploaded mesh will now be in your inventory. Double click to wear it. Upload all your new bake textures, then right-click on the clothing item you’re wearing and edit to apply texture.
Pose your avatar the way you want it, then take a snapshot, replace the texture, take another snapshot, and keep going until you’ve got all the colors you need.
Another tip for uploading to Kitely Market: If you have a lot of items in your inventory, it can be hard to find all the things you need to upload to your Kitely Market store.
What I did was create a new folder with an asterisk in front of its name so it would come up first. Then I created a folder for the item, with the skirt, its alpha layer, underpants — whatever I wanted to sell as part of the package.
Then I copied the item folder over a bunch of times, changed the name of each one to include the color name, and changed the name of each skirt in each folder to include the different color name.
Then I put on one skirt after another, changed its texture to the right color, took its picture, then went onto the next skirt in the next folder.
Then when I was ready to add it to my Kitely Market store, I could simply add the entire folder for that color skirt, saving a little bit of time.

- OSgrid back online after extended maintenance - April 16, 2025
- Analysts predict drop in headset sales this year - March 25, 2025
- OSgrid enters immediate long-term maintenance - March 5, 2025