In 1911, Arthur Brisbane’s quote “a picture is worth thousand words†appeared in a newspaper article.
Today more than 100 years later, everyone has the means to show pictures at rates of 60 per second and magnify the value of their communication.
The readily accessible means to communicate our ideas with video images is one of our greatest resources. Video images, like water, flow through our daily lives, conveying historic, entertaining, and sometimes life-saving information. This visual and aural stream enables us to absorb and visualize concepts with greater speed, capacity and understanding.
If you have a need to explain a complex idea visually in a short amount of time, then you are probably thinking about making a video tutorial. Virtual environments are great places to make a video tutorial or video-based 3D simulation.Â
Why use a virtual world?
A simple YouTube search of the phrase “3D simulation with Second Life†— or OpenSim if you prefer — will bring up hundreds of videos demonstrating why virtual worlds are so useful for video tutorials.
Here are six of the most prevalent reasons:
- Virtual environments are excellent for collaborating in 3D, and demonstrating how it’s done.
- For prototyping a new design, they provide a virtual workspace.
- For scenarios that are hard to build or expensive, they provide a very low-cost alternative
- They can provide space for a rehearsal of theatrical blocking, stage mechanics, without using the theatre space, thereby providing a virtual rehearsal hall.
- They provide a virtual animation studio for the creation of 2D or 3D animation
- The environment can be optimized for clarity, helping the observer to focus on the content.
Who uses them for tutorials?
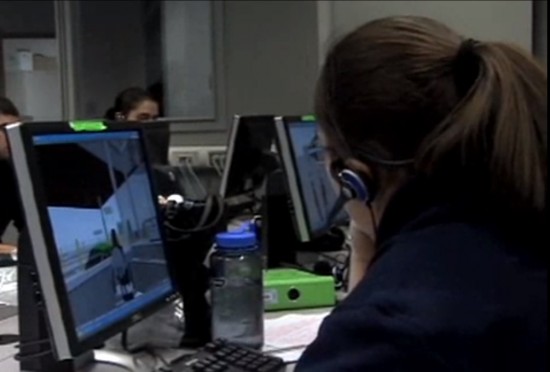
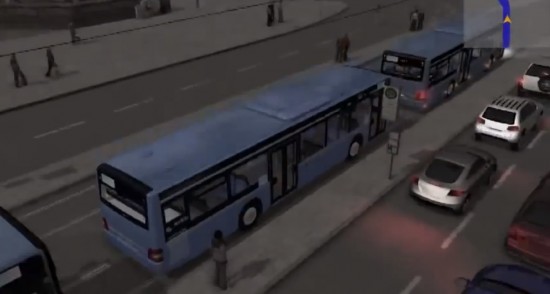
Many, many schools have created virtual environments for teaching and training, one notable example being Loyalist College. They used Second Life to develop a border guard training simulation starting in 2008.
The New Media Consortium has developed a strong presence in Second Life and supports development in OpenSim as well.
Organizations like the US Army, Save the Elephant, American Cancer Society, and the Nonprofit Commons have developed virtual world environments in Second Life and OpenSim based grids to promote their causes and teach people.
What kinds of virtual environments are used?
The short answer to that is any kind that is possible to imagine! They will build experimental and laboratory settings, classrooms, restaurants, parks, hotels, anything necessary for supporting the message. A quick glance at the Second Life Learning Destinations list will reveal such interesting locations as: “Bed Bug Hotelâ€, the UK’s “National Health Service†and the “Medical Examiner’s Office.”
Where do you find them?
Aside from public grids like Second Life, and OpenSim based public grids like the OSGrid, Jokaydiagrid, Kitely, InWorldz, Avination, FrancoGrid there are many more locations available in the Metaverse.
When is it the most useful to use a virtual world for tutorials?
While there are many reasons for using a virtual environment to create your tutorial in, three of the most compelling are:
- the subject matter requires team work to explain and demonstrate,
- the environment is dangerous or unbuildable in the physical world without great expense, and
- the environment needs to be globally accessible.
Tip #1: Viewer window and screen resolution
Be in the know about resolutions and compression and decide the upload file format early on.
You can find the important information about the recommended upload formats and resolution at YouTube and Vimeo.
More than likely you will want to record your video at the highest resolution your system can handle. Good high resolutions are the 16:9 ratios of HDTV 1280 x 720, or 1920 x 1080.
You should set up your viewer’s window to match that resolution. In the Firestorm and the Second Life viewer, that is done under the Advanced Tab (Ctrl+ALT+D to activate it) on the top menu bar. Simply select the format you would like to record and edit in.
When the video is played online, the quality will be adjusted based on your bandwidth, so having a high quality video to start with is always a good idea, in case the observer has to watch it with a low bandwidth. Of course, HDTV will create bigger files, and take longer to encode and upload, so prepare yourself and budget your time.

Tip #2: Find good tools for the visual creation
There are seven basic tools you need for good video creation:
- A computer with graphics processing capacity
- Video recording software
- Video annotation software
- Video editing software
- Graphics (2D and 3D) software
- Sound recording equipment
- Sound editing software
There are many ways to obtain a computer that is video capable, if you are in the market and want to assemble it yourself, a good place to start compiling your list of components is here. Another place to look is at computer companies that custom build computers for you.
Video recording software is available at many price levels. There are several freeware options like Ezvid and CamStudio or low-cost ware, like Fraps. On the upper end you will find Camtasia, which also includes video editing tools.
Video annotation software like Pointer Focus will allow you to draw focus to the mouse, highlight areas, magnify areas, and more. An essential tool if you need to draw the eye of the observer to a particularly salient point of the screen information.
Video editing software also has many options, from freeware to the vast range of software options at varying prices. One good option, if you want to subscribe is the Adobe Creative Cloud , since it provides 2D and 3D graphics as well as video and sound editing in one interconnected program.
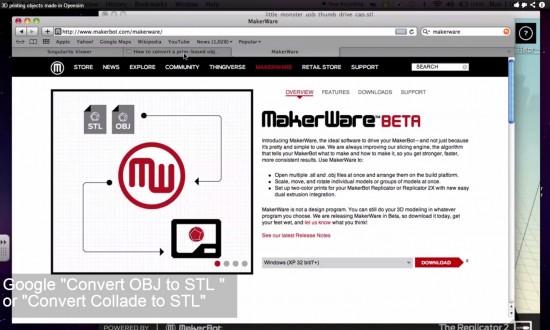
At various times your tutorial will need some graphic elements. A freeware option for 2D is GIMP which has a large following, as well as Blender for your 3D graphic needs. Besides utilizing the more expensive options available in the Adobe Creative suite or cloud, you could also try 3DS Max for upper end 3D graphics.
For good sound, sound effects, and clear voice overs, you need a good microphone and a means to record what it hears. Fortunately good sound can be recorded over a high end gaming headset, or with a hand-held mike.
When you need to edit sound, there are freeware options as well as the high end options like Adobe Audition which is included in the Adobe Creative suite.
Tip #3: Plan with a shot list or storyboard
Every good tutorial or simulation has been planned. One of the best ways to do that is to create a “shot list†or list of camera views and angles you want to record or script into the furniture, or avatar camera in the virtual environment. A shot list will help you track your progress as you collect the shots, and also provide a guideline for the editing later on.
The other powerful tool is a storyboard. No need to be a great sketch artist to make one of these, you can use snapshots from the virtual environment and place them into this format and list the shots underneath with any notes you may have about the editing transitions and sound.
It’s best to keep your tutorial short, at around two to four minutes. Break a longer tutorial into four to six sections, so you give the observer a chance to take a break and absorb the information. If you want to learn more about the process of editing you can start here.
Tip #4: Using onscreen graphics and directional icons effectively
Remember, you are presenting a lot of information in a tutorial or simulation. Slow down your mouse moves, and make them clear and deliberate, unless you want to rev the observer up by an agitated telestrator effect.
If you are going to insert any slides or full screen graphics, make sure they are up for three to five seconds so people can read them. Keep your directional icons clear and simple, and fade them away when you are about to finish with them.
Tip #5 Use a clear voice for narration
Write your “script†ahead of time; link it to your visuals in the storyboard.
If you are doing a voice over, try reading the lines out loud several times, to test for tongue twisters. Again, slow down, and speak clearly into your recording microphone. Avoid getting too close to the mike, so you don’t send puffs of air towards it when you say words with the P letter in it. This is called “popping your Ps†and can be avoided by backing off.
Also listen and ask yourself, is my diction clear? Am I pronouncing all the words correctly?
Nothing undercuts your authority as a teacher in a tutorial like a poor voice over.
- Oculus viewers updated, still not building-friendly - June 6, 2014
- In-world with the Oculus Rift - March 30, 2014
- 5 tips for video tutorials and 3D simulations - February 17, 2014